Monday, April 1, 2013

Lo-Fat Raspberry Dessert


I use this recipe when I need to take a dessert for a large number of people.
It can be made with sugar free jello and low fat cool whip. It is light and fresh and
is delightful in the summer. Oh so Lovely!


Raspberry Layered Dessert
    • Pastry:
      • 1/2 cup margarine
      • 1 1/2 cup flour
      • 2 tbs sugar (mix)
      • Press in 13 x 19 and bake at 350 degrees until lightly brown, cool.
    • Creme filling:
      • 8 oz cream cheese
      • 1/2 cup margarine
      • 2 cups powdered sugar
      • Mix with beater until lumps are gone
      • Spread over pastry layer
    • Optional 1 cup chopped nuts over cream cheese layer
    • Layered 3:
      • 1-3 oz package raspberry jello (sugar free can be used)
      • 2 packages frozen raspberries or 2 cups fresh raspberries (more or less)
      • 1/2 cup boiling water (mix water and jello until dissolved) add ice cubes to set quicker and then once it starts to thicken remove ice and add free cool whip.
      • Refrigerate
    • Layer 4:

Monday, August 27, 2012

From Farm to Table

Its time for me to go to the market to get as many fresh fruits, flowers and veggies as possible. I love corn and fresh corn, its one of my favorites. I like to add a little bit of it in this recipe for corn muffins, its delish. Its a jiffy and oh so good when they are taken out of the oven slathered with butter and served warm.


Sweet Corn Muffins
    • Oven: 450 degrees 9 to 12 minutes
    • Yield: 1 1/2 dozen large muffins or 3 dozen small muffins

    • 1 cup all purpose flour
    • 1/2 cup yellow cornmeal
    • 1/2 cup sugar
    • 1/2 cup butter, melted
    • 2 tsp baking powder
    • 1/2 tsp salt
    • 2 eggs
    • 1/2 cups milk
    • 1 Tlb. corn syrup
    • 1/2 cup fresh corn
    • Mix first six ingredients. Combine eggs, milk, corn and syrup separately; mix the flour mixture and the milk mixture together. Grease muffin tins and fill each cup half full of batter. Bake 9 to 12 minutes or until brown at 450 degrees. 


Friday, May 4, 2012


Flat coin pearl and a strip of leather make a pretty pair in this simple but elegant ring. I thought I would take a little gift to a friend but I wanted it to be unique. So I went to the studio and started playing. This is what I ended up with. I added smal tiny grey pearls on either side of the the flat pearl to make a nice transition. I tied them in with silk thread and knotted it on the inside of the ring. I think this is a great gift for just about any gal that loves jewelry. SavvyandSky.com or TinaRothwell.com for other lovelies.

Wednesday, April 4, 2012

Mixed Media Bracelet


I am working on some spring and summer designs for a new store coming to town. More to come on the new concept boutique here in Grand Rapids, MI. But because the owners love to recycle and are very eco-friendly, I have decided to incorporate recycled components in this seasons designs. In this piece I have vintage glass elephants, vintage gold and turquoise end caps surrounding blue shell pearls along with an ivory vintage glass bead. These passe' lovelies pair nicely with genuine pearls, crystals and a large blue and white genuine agate. Oh so lovely! For an added bonus I have been adding tassels on my summer designs for that elegance we all love. As always SavvyandSky has amazing pieces for you or that perfect gift your looking for.

Sunday, March 11, 2012

Easter Table DIY


 So this year I wanted to go all out and have some whimsy with my casual farm table in my sunroom. I wanted to decorate an Easter table that would be fun and full of different textures and color. 


Pictured here I have eggs and little white bunnies in a small galvanized tin tub, sitting in the kitchen. 
I have an overall casual feel to the decorations with a little garden feel to the decor. 


Here you can see that I have a couple of these next to each other. They are so cute and festive.


Here you will find a cast iron bunny sitting on my farm table with little wrapped candies.


I am almost done with decorating my Easter table, I simply love where it's going. I have been working on it for a few days now and feel like it's almost there. I started by putting down some burlap and then I added some shiny champagne fabric along with garland of natural materials to add the textures I was looking for. I then added moss place mats under round wicker place mats for that garden feel. Adding the ceramic bunnies was a must along with garden urns filled with plants, greenery and  moss. The easter garden theme is all unfolding and I am loving it. I will post more pictures as we get closer to our special Easter day.

Wednesday, February 22, 2012

artistic and recycled fingerless gloves - tutorial

 Pictured here is: a tracing of my hand - cut on a fold - out of fleece.

 Things you'll need are: a pattern - I made one out of a brown bag from the grocery store.
 fleece, old sweater or any other fabric you want to recycle. Thread, scissors, pins, sewing machine and buttons.
 First, I cut out the fleece for the lining of the gloves by using a pattern (pictured above) I made one from tracing my hand. Next cut out your sweater in strips and/or piece. Use your pattern for your sewn sweater pieces and cut to size. Remember the seams will show so no need to be perfect. I used the ribbing of the sweater sleeves for the tip of the gloves. That way there will be no fraying.
 I sewed the strips together with the seams showing. Thats the great thing about about this project,    mistakes are ok.
 I pinned the sewn sweater strips to the cut fleece and sewed around the glove. Make sure not to sew the top or where your finger goes.
 I placed it on my hand for a better fitting, in case I needed to take it in.
I added ribbon, lace, crystals and vintage buttons for the final touch. This project is an easy one considering I am a novice.  If I can make these anyone can.

Saturday, February 11, 2012

Prosecco for a Valentines Day Toast


    Saint Valentines day, a sweet (literally) day filled with kind gestures toward a love interest or a romantic interest in which we send valentines day cards, candy and or flowers. Our modern day symbols often include cupids, heart shaped cards, gift boxes, and white darling doves. We associate these symbols along with vivid colors in shades of red, pink, and purple when we go shopping for that special day.
    Today I share another recipe with you, the color of a soft light rose -  Ruby Sippers (orange cranberry syrup) which takes a few minutes to make but is relatively easy to whip up.  It looks very glamorous and elegant in champagne glasses combined with champagne or prosecco.


    Ruby Sippers
    Makes 6 cocktails
    Recipe can be doubled
    Pulse in processor
    1 1/2 cups fresh or frozen cranberries
    1 cup cranberry juice cocktail
    Put into saucepan over med. heat and then add
    1 cup sugar 
    1 orange and ( zest of the orange - use micro planer or zester) and juice of 1 orange
    If desired rub the rims of champagne flutes with and orange and dip in red sugar and set aside.
    Simmer in a saucepan over med. heat w/ sugar, orange rind, and juice until syrupy about 10 min. Strain and cool to room temperature.
    Pour 1 to 2 Tlbs. into bottom of glasses then top with sparkling wine. Garnish cocktails with whole cranberries or berries of your choice if desired.


    Sunday, February 5, 2012

    Valentines Day Treats


     Cake Pops dipped in chocolate and topped off with some white chocolate!


    Truffles dipped in white chocolate with white sprinkles on top.

    These truffles are amazingly good and very simple to make, so if you want an easy treat to make for your  special valentine. Go ahead and try these you can do it!

    Melt in your Mouth Truffles

    makes 3 dozen
    Melt 1/2 cup heavy cream
    8 Oz. dark chocolate (coursly chopped)
    Stir In - 1/4 cup butter softened
    Cool then add 2 teaspoons vanilla
    Refrigerate til firm
    Make 1” balls and roll in finely chopped nuts, cocoa, powdered sugar, etc.
    Refrigerate and Store

    Peanut Butter Balls

    1/2 Cup peanut butter
    3 Tlbs. butter
    1/4 Cup Rice Krispie Cereal
    1 Cup powdered sugar
    Combine and knead til smooth, shape into balls.
    Dip in chocolate.

    Simple Truffles

    2 1/2 pks of Bakers Chocolate or (20 squares)
    or 1 Bag of White chocolate Chips
    8 oz. pkg of Cream Cheese
    Decorations of your choice
    1. Melt chocolate and beat cream cheese w/mixer until creamy.
    2. Blend in melted chocolate and refrigerate until firm.
    3. Shape into 36 balls and place on wax paper.
    4. Melt remaining chocolate and use fork to dip truffles and decorate.


    Monday, January 30, 2012

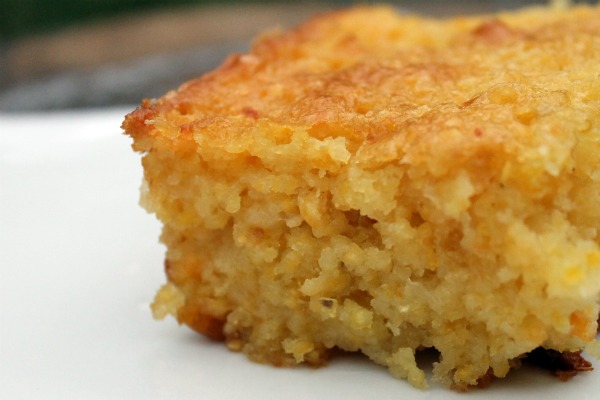
    Corn Bread Recipe

    I found this cornbread recipe on Pinterest (susie davis), my new favorite site. If you are a visual person than this site is for you! I love the fact that you can keep all the things you love from the internet in one place. Follow me on my visual journey. ENJOY!

    Bald Pate Inn Cornbread
    1 c. butter * 1 c. sugar * 4 eggs * 2 c. canned creamed corn * 1/2 c shredded monterey jack cheese * 1/2 c. shredded cheddar cheese * 1 c. flour * 1 c. yellow cornmeal * 4 t. baking powder * 1/4 t. salt
    Heat oven to 350° degrees ~ and grease a 13 x 9 inch baking pan. Using an electric mixer, beat butter and sugar until blended and smooth. Add eggs, one at a time, beating after each. Gradually beat in corn and cheeses. Stir in remaining ingredients. Spread evenly in the pan. Place in oven, close door, immediately reduce heat to 300° degrees and bake 1 hour or until done. Don’t over cook this! In the center the top will look moist ~ just check knife to make sure comes out pretty clean before removing from oven.

    Sunday, January 15, 2012

    Napkin Rings for the Fun of it!

    I have had a luncheon for my girlfriends, Thanksgiving, Christmas and friends all over for dinner in the past couple of months. Guess what has been the hit or the topic of conversation? Yes you guessed it, the napkin ring. The adults have played, the kids have played and yes even granny and grandpa. They play little games like "lets see who can be the most creative with these fun twisty flexy rings", by making fun and inventive shapes. Many hours have been accumulated playing with these oh so pretty and fun napkin rings! Everybody wants to know where I purchased them and where they can buy them. I purchase them in bulk and decided to put them for sale on my website. Check out SavvyandSky.com for details (under goodies). They can be purchased in sets of 6 and 12. They come in bronze and bright gold and measure approx. 32" these fun little dittis bring a whole new level of creativity to the family and dining.

    Tuesday, December 20, 2011

    Tutorial on Candy Presents for Cupcakes

    You will need: 1. candy starbursts
                            2. fruit roll ups
                            3. sharp knife
                            4. patience

    Cut your fruit roll ups in thin long pieces.

    Wrap your starbursts with the fruit roll ups. They will stick very easily to the candy, so just make loops on top of the candy for the bow. Use your knife to press into place.


    Make as many as needed. You did it! Wasn't that easy? Now your ready to decorate your cupcakes and or set on a pretty tray.
    Oh so elegant and yummy!

    Tuesday, December 13, 2011

    popcorn ball recipe

    I don't know about you but I have many memories of enjoying popcorn balls every Halloween and Christmas. I loved the colored paper they used to be wrapped in, that was part of the fun. There's something about colored paper and unwrapping the sticky goodness inside. So today I thought it would be fun to share a couple of recipes. My sister Pam is our guru of cooking and she swears by these recipes. So good luck and enjoy!

    Honey Popcorn Balls

    ¾ cups honey
    ¾ cup sugar
    1 t salt
    ½ cup water
    3 quarts popped popcorn
    2 T melted butter

    Directions
    1. Add sugar, salt and water to a 3 quart pot and stir until liquid reaches 300°F, which will be a very brittle stage.
    2. Add honey slowly, stirring until blended.
    3. Cook until liquid reaches 240° (about one minute.)
    4. Pull liquid over popcorn and mix with a wooden spoon.
    5. Working quickly, drop two large spoonfuls of popcorn onto a buttered cookie sheet.
    6. As they cool, form into balls (rub fingers in butter to keep the popcorn from sticking to your hands.)
    POPCORN BALLS
    Ingredients
    1. 1/4 cup (1/2 stick) unsalted butter, plus more for buttering hands
    2. 1 package miniature marshmallows (10 ounces)
    3. 1/4 cup light brown sugar, firmly packed
    4. 3 quarts popped popcorn
    5. 1 cup dried cranberries, or English toffee bits, optional
    Directions
    1. Melt butter in a large heavy pot over low heat. Add marshmallows and brown sugar and stir until melted. Remove from heat.
    2. Pour popcorn and cranberries, or English toffee bits if using, into pot; toss well. With buttered hands, shape into 2 1/2-inch balls. Set on parchment lined baking sheet to dry slightly
    Crunchy Caramel Popcorn Balls
    1. 4 tablespoons butter, plus more for baking sheet
    2. 10 cups plain unsalted popped (from 1/2 cup kernels or a 3.3-ounce bag microwave popcorn) popcorn
    3. 1 cup cashews, coarsely chopped (optional)
    4. 1/2 cup packed light-brown sugar
    5. Coarse salt
    Directions
    1. Preheat oven to 300 degrees. Butter a large rimmed baking sheet; set aside. Place popcorn in a large bowl; if using cashews, add to bowl and toss to combine. Set aside.
    2. In a small saucepan, bring butter, sugar, 1/8 teaspoon salt, and 2 tablespoons water to a boil, stirring constantly. Working quickly, drizzle popcorn with sugar syrup, and toss.
    3. Spread popcorn evenly on prepared baking sheet. Bake, tossing occasionally, until golden and shiny, about 40 minutes. Transfer hot popcorn to parchment-paper-lined baking sheet; let cool.

    Monday, December 5, 2011

    Upcycled Bracelet


    A close-up of one of my latest bracelets. In this piece I used an old bracelet that was covered with faux pearls and shells. I loved the bracelet because it is made on a stretchy band. So guess what I did? Yes, I removed all the faux pearls and shells and added hill silver beads, swarovski crystals, genuine pearls, a vintage pink bead and an ex-large genuine pearl cluster bead. 


    Sometimes I think when bracelets are covered with beads they can look typical. In this case I thought since the recycled bracelet had substance, all I needed to do was add beads asymmetrically to create interest. The bracelet also was upgraded in that natural and genuine pearls and beads were used. If you have any pieces you'd love up-cycled contact SavvyandSky.com they have a service in which they will up-cycle your pieces starting at 25. I love unique and one of a kind pieces of jewelry, it's so in!

    Thursday, November 17, 2011

    Thanksgiving Table Inspiration


    So I had the pleasure of going to lunch at a dear friends home. Kim not only has a beautiful home but she makes it inviting and alluring. She uses her home to host lovely parties and luncheons such as this for an art group with which we belong.  Kim believes in sharing her home with those she loves.  Upon entering the dining room your immediately in awe of the warm color scheme and neutral tones of the the entire space, love the red walls.  She totally outdid herself with this years centerpiece for her amazing table, all designed and decorated by her. She fooled me, I thought she purchased it.


    Here you will find a pheasant as the main focal of the centerpiece. He is rather large which makes him noticable and brings him to the forefront. To make the centerpiece cohesive Kim added pheasant feathers throughout, along with different greens, feathers and pinecones. She started with a basket and added all the color and textures she wanted for the the main event.


    Here notice how she added more pheasant feathers under the arrangement for more cohesiveness. She served soup in ceramic white pumpkin bowls. The tablecloth is layered with a textured fabric and topped off with burlap. She used feathered napkin rings and ochre napkins to compliment the overall green colorscheme. The napkins can be found at Pier1 Imports. Notice the orange pumpkins as well for more unity.


    She made us all feel so special by pulling out all the stops. Notice the feather placemat and the silver plate charger under the china. The turkey plates are a seasonal additon which bring joy to the Thanksgiving table. They can be found at Pottery Barn. She used brown wine goblets and served a lovely wine during lunch. It is always a treat to visit with friends and enjoy the fruits of their labor. In this case, Kim uses her talent of tablescaping. She uses the table as her palette, and she succeeds in not only design but using her home as a place to express her talent. Thank you Kim for your friendship and talent!

    Wednesday, October 26, 2011

    The Perfect Earrings for the Holidays!

    Do you want the perfect pair of earrings for that Christmas or Holiday party? You can give these to your best friend or that secret santa gift. I love how they have a contemporary look but yet can pass as a vintage inspired. Love love love these. So ladies, are these the perfect little red earrings or what? I think they are simple, cute, and lightweight. If you want just a bit of red, these are it. SavvyandSky carries them in all colors, so check them out. They are on brass eurowires with glass crystals and measure approx. 1 1/4" Buy yours today, you'll be glad you did.

    add to wish list